
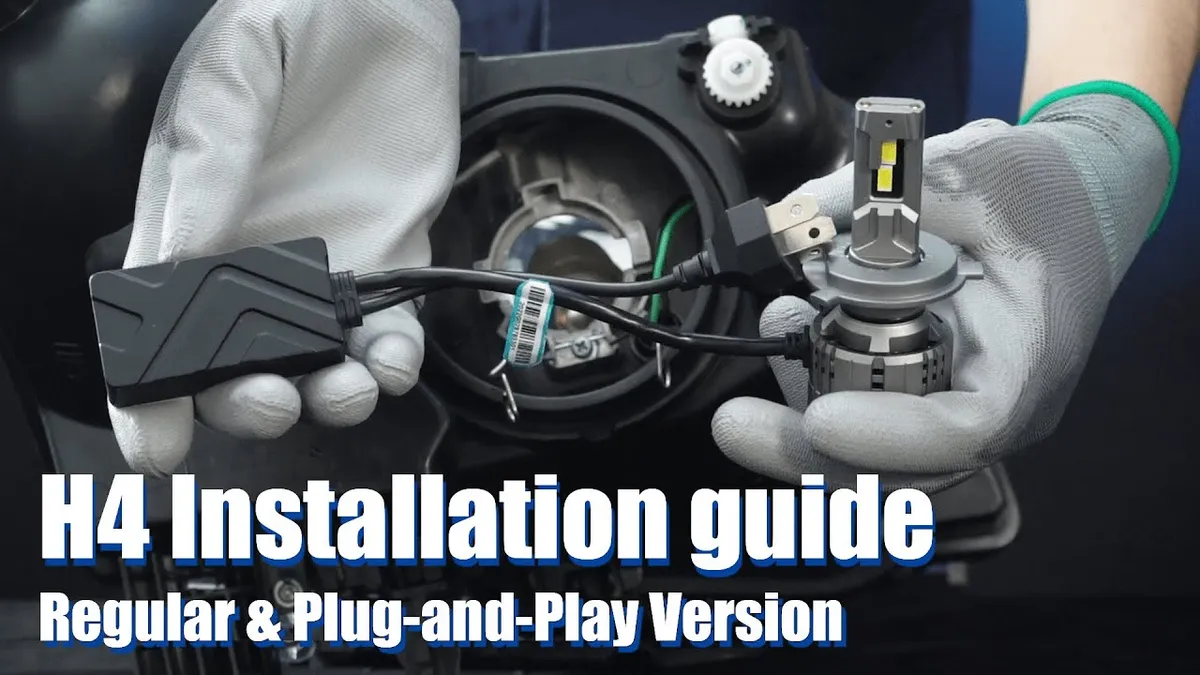
Installing an H4 LED headlight bulb on a motorcycle is a 30-minute job — until the beam scatters, the dashboard lights up, or the bulb works on high beam but not on low. Almost every failure we see in the field comes down to four things: the mounting collar, the orientation of the LED chips, polarity, and beam aim.
This illustrated guide walks through the five steps in order, with photos at each stage, plus the checks we run before a batch leaves our factory. An H4 (also sold as 9003 or HB2) is a single-base, dual-filament bulb: one socket carries both low and high beam, which is why it is the most common upgrade base on motorcycles and cars alike.
What an H4 bulb is — and which type you are installing
The socket is the same for all three technologies, but the installation differs. Know which one is in your box before you open the dust cover.
H4 halogen (what you are replacing)
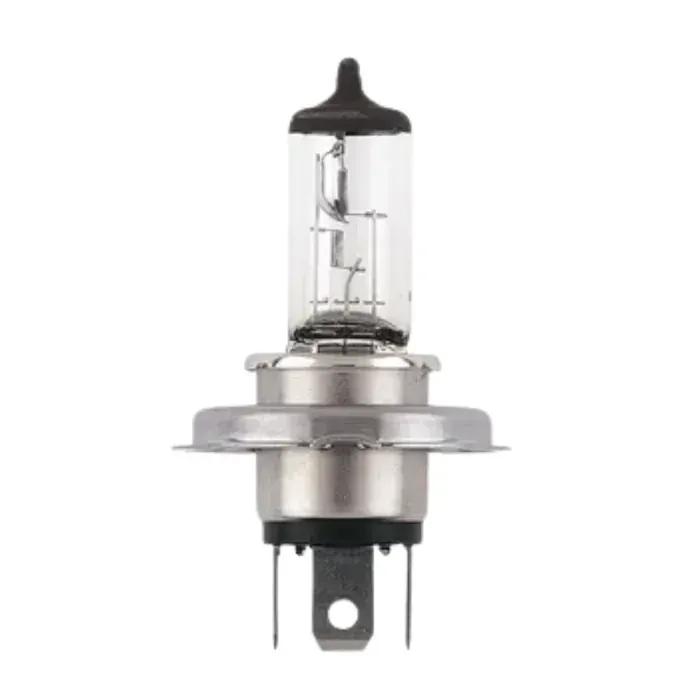
H4 halogen bulb: three-tab base, single glass envelope, two filaments.
Halogen is the baseline: cheap, universally available, and rated for roughly 500–1,000 hours. The factory harness, the dust cover and the bulb retainer are all designed around this shape.
H4 HID (legacy upgrade, extra parts required)
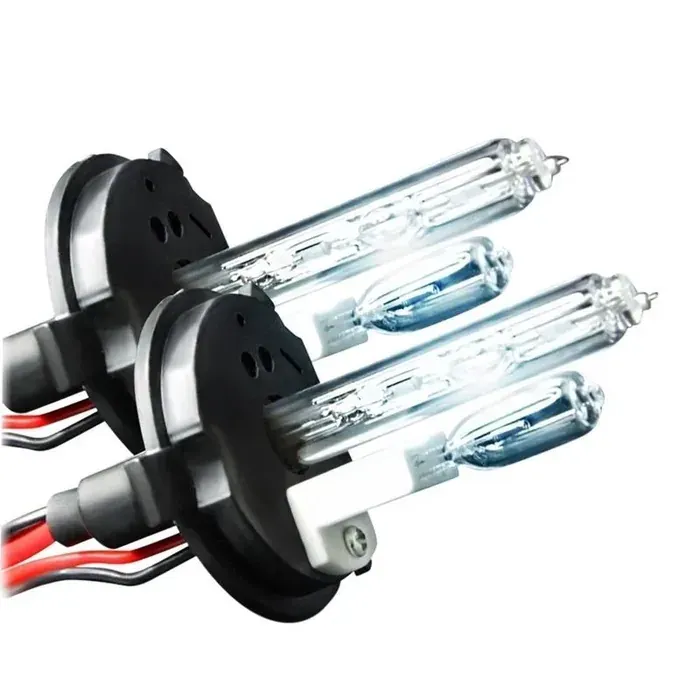
H4 HID kit: bulb plus ballast wiring — not a plug-and-play replacement.
HID produces light from an arc tube, so it needs a ballast and warm-up time, and modern HID kits are usually a step backwards for motorcycle charging systems compared with LED. If you find one in your stock, check the bike’s alternator output before fitting it.
H4 LED (what this guide installs)
LED uses chips on a slim stalk with a separate driver. Two details decide whether the result is a proper beam or a mess: the removable collar (so the bulb body can be installed after the retainer is locked) and the chip orientation at 3 and 9 o’clock.
Before you start: four preparations
| Check | Why it matters on a motorcycle |
|---|---|
| Confirm the base: H4 / HS1 / BA20D / H7 | HS1 and BA20D look similar to H4 at a glance but do not interchange — a wrong base is a returned order |
| Voltage | 12V is standard on almost all motorcycles; 24V and 6V systems exist on older utility bikes and need a matching driver |
| Clearance behind the housing | LED bulbs are longer than halogen: a fan or heat sink can foul the wiring boot, the fork or the fairing |
| Tools and gloves | A screwdriver or hex key for the fairing or dash panel; gloves so you never touch the chip face or the seal |
Also wipe dust and moisture from around the housing before opening it, and disconnect the battery (negative terminal first). LED drivers do not enjoy being plugged in live, and a slipping spanner across the positive terminal is how workshops end up replacing fuses.
Step 1: Open the dust cover and remove the halogen bulb
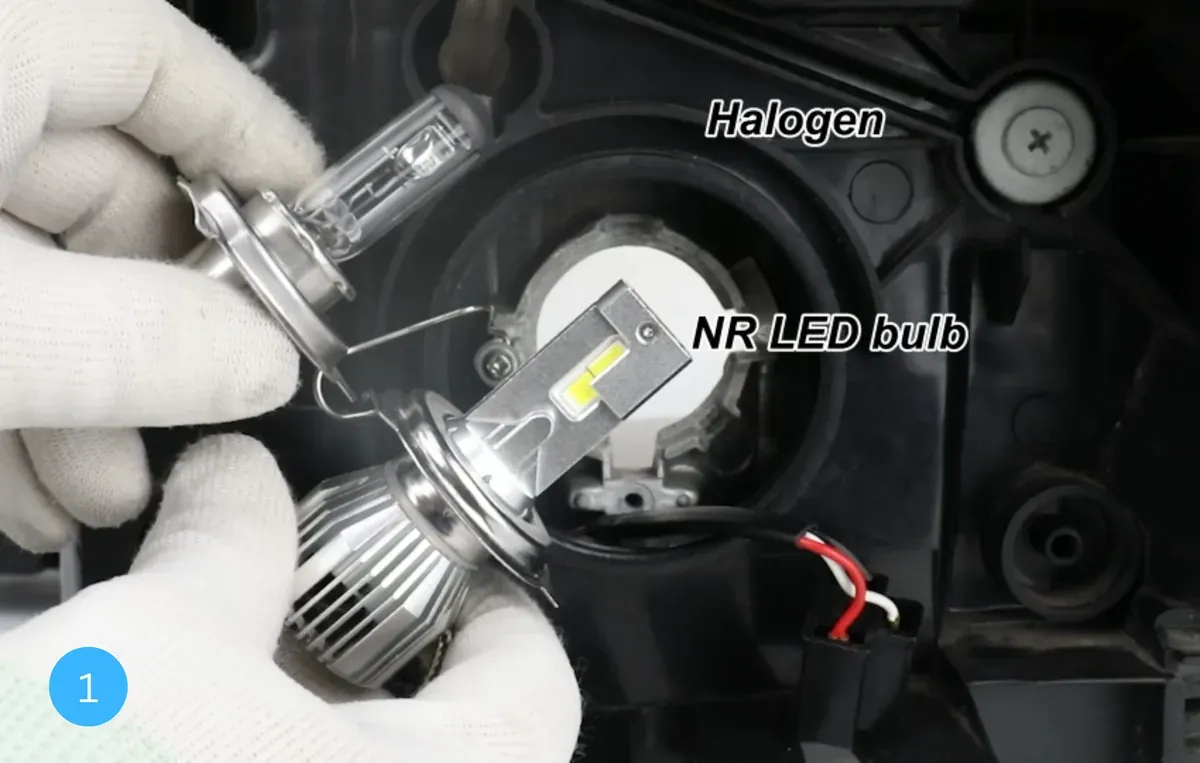
Step 1 — unclip the connector, release the retainer and lift the halogen bulb straight out.
Unclip the wiring connector, release the retainer — most motorcycles use a spring clip or a bayonet ring — and lift the bulb straight out without twisting. Keep the old bulb: it is your reference for the three-tab orientation, and it makes a usable spare for diagnostics later.
Step 2: Mount the LED collar before the bulb
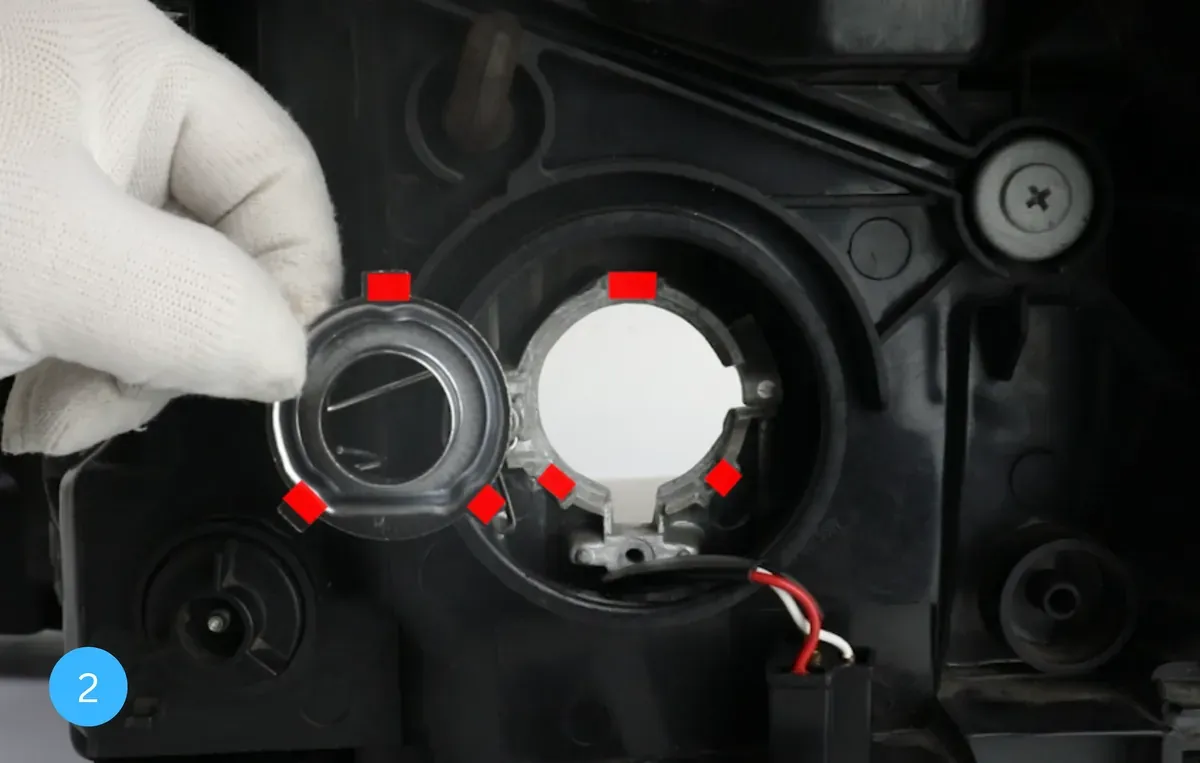
Step 2 — the collar goes in first, with its three tabs matching the original bulb.
Retrofit H4 LEDs have a two-piece body: a thin mounting collar and the bulb/heat-sink assembly. On a motorcycle the heat sink is usually too bulky to pass through the retaining clip, so mount the collar on its own:
- Seat the collar in the socket with its three tabs aligned to the original bulb position.
- Lock the spring clip or bayonet ring over the collar.
- Check the collar sits flush — a tilted collar tilts the beam, no matter how carefully you aim later.
Step 3: Insert the bulb into the retainer holder
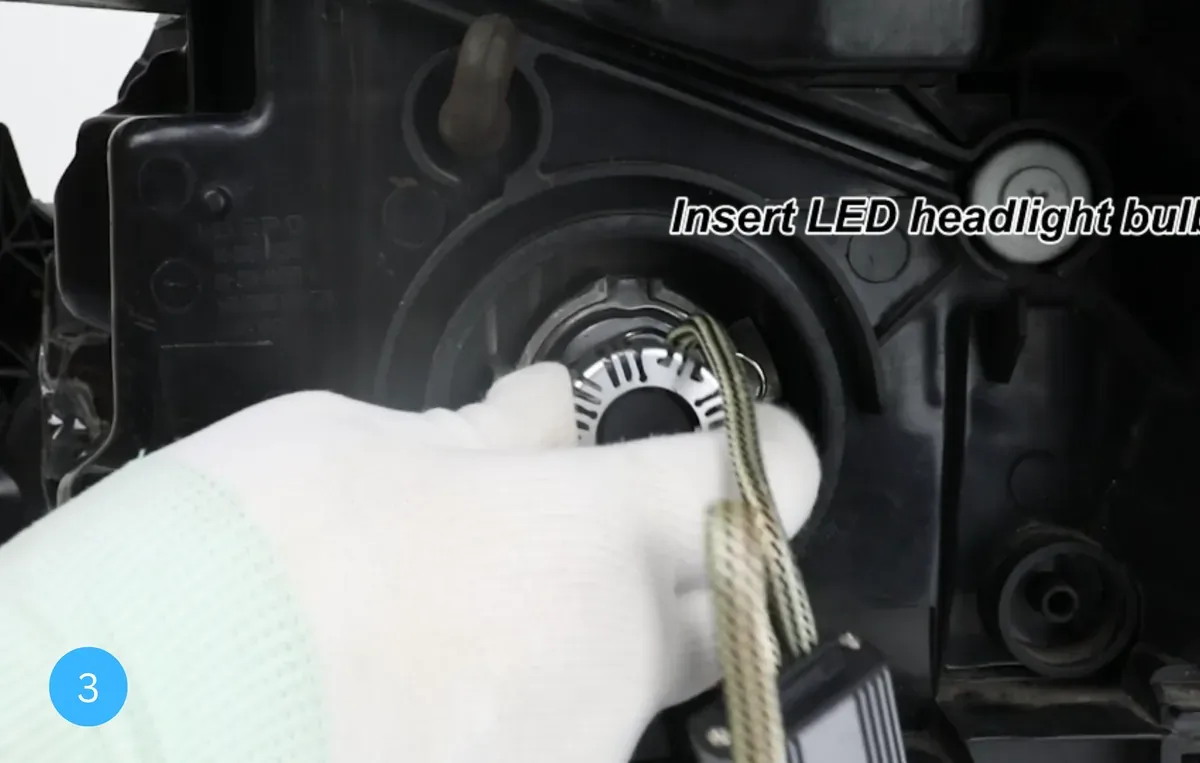
Step 3 — slide the bulb body into the collar and rotate until the detent engages.
Slide the bulb body into the collar and twist until it clicks into its detent. Then refit the dust cover: if the original rigid cover no longer fits over the heat sink, use a vented rubber boot rather than leaving the housing open. Water in a motorcycle headlamp is the fastest route to a corroded connector.
Step 4: Rotate until the chips sit at 3 and 9 o’clock
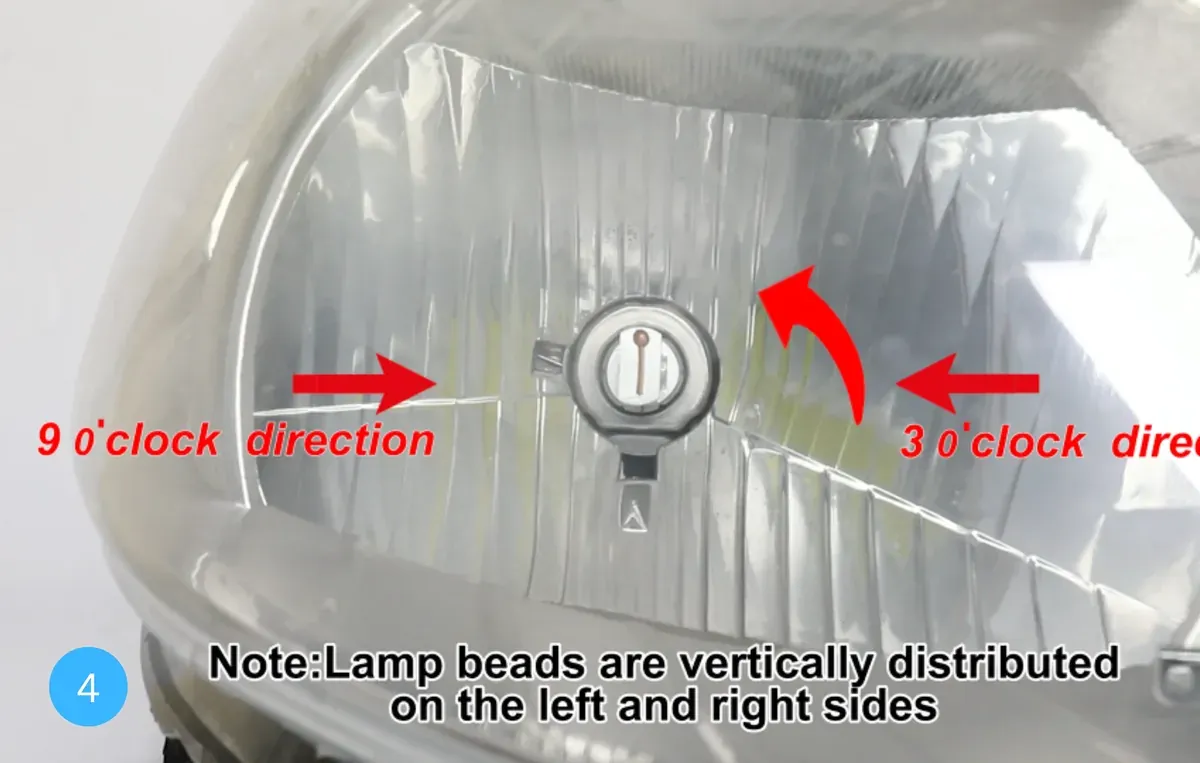
Step 4 — chips left and right, never up and down. This single detail decides beam quality.
The LED chips must sit on the 3 o’clock and 9 o’clock plane — pointing left and right inside the reflector. If the bulb twists into position with chips pointed up and down, you will get a dark band in the middle of the beam and glare at the top edge, whatever you do with the aim screws afterwards.
Most quality bulbs have a detent or a marked flat that allows only the correct orientation. If yours does not, rotate the collar 90° in the socket until the chips are horizontal and re-tighten.
Step 5: Connect the plug, then test polarity before reassembly
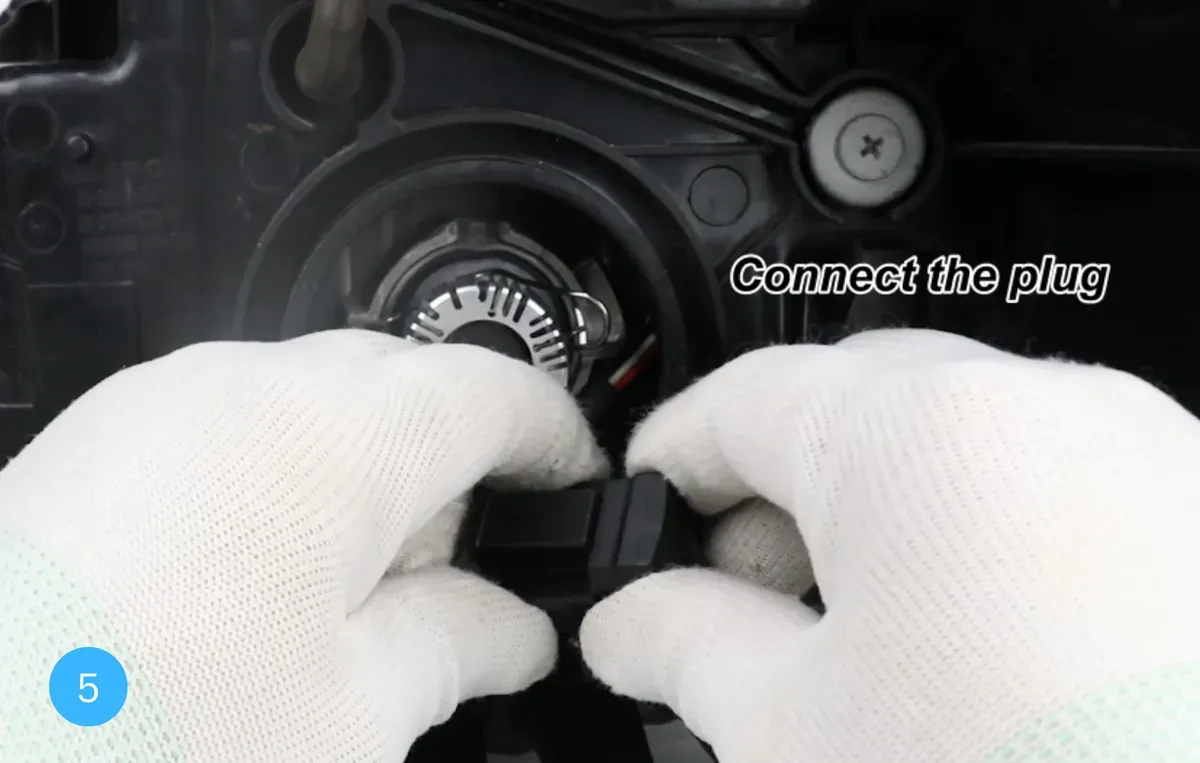
Step 5 — connect, switch on, and verify low and high beam before closing the bodywork.
LEDs are polarised. Plug in the connector, switch on and check:
- Low and high beam both light — done, reassemble.
- Nothing lights, or only one beam — reverse the connector 180°. Reversible plugs are standard on better bulbs because this is so common. Never reverse the battery to “test” it.
Reassemble trim and bodywork only after both beams have been verified.
Aim the beam — brightness is not the goal, usable light is
A mis-aimed LED is brighter than a halogen and worse than a halogen: it lights the skyline and blinds oncoming traffic. Set it up like a workshop would:
- Park the bike on level ground with the rider’s weight on it (or an equivalent load), tyre pressures set.
- Stand the bike upright, 5–10 m from a wall or garage door, perpendicular to it.
- Mark the headlight centre height on the wall.
- Switch on low beam and adjust the screw(s) until the cut-off line sits about 1.5% below the mark (1.5 cm per metre — roughly 11 cm or 4 inches at 25 ft), with the hot spot centred, not cocked to one side.
- Sit on the bike and re-check: suspension sag changes aim on soft forks.
The 10 m and 25 m vertical-screen method is the same principle used in the UNECE lighting regulation that governs motorcycle headlamps and symmetric passing beams (UNECE Regulation No. 113). Asymmetric low-beam lighting requirements for motorcycles are set out in Brazil’s CONTRAN Resolution 970/2022 and in equivalent national rules elsewhere. Check what applies where you ride.
Troubleshooting: the six problems buyers report
| Symptom | Cause | Fix |
|---|---|---|
| Nothing lights on either beam | Reversed polarity | Flip the connector 180° |
| Only high beam works | Low-beam driver channel fault, or wrong pin mapping | Test with a known-good bulb; replace the driver if the bulb is fine |
| Flicker at idle, steady at revs | Voltage ripple from an older charging system, or a CANbus/error-detection circuit | Fit an anti-flicker resistor or a CANbus-compatible driver |
| Dashboard warning light | Vehicle monitors lamp load | CANbus decoder or load resistor matched to the original wattage |
| Dark band in the beam | Chips not horizontal, or bulb not fully seated in the collar | Rotate 90°, push down until the detent engages |
| Output drops after 10–20 minutes | Thermal derating: blocked heat sink or a bulb with no fan | Restore airflow; specify bulbs with a fan or a solid heat sink |
What to check before you buy a batch (factory QC points)
If you buy H4 LEDs in bulk, these are the specification points that decide how many units come back:
- Collar tolerance. A collar that is 0.2 mm loose tilts the bulb in the socket and ruins the beam. Ask for the collar number and test-fit a sample.
- Chip alignment fixture. Hand-glued chips drift. A factory that fixtures the emitter can warranty its beam pattern.
- Driver included. A bulb supplied with an anti-flicker driver drops the returns rate on newer bikes dramatically.
- Heat management. Fan versus finned heat sink: check the height, and check the noise of a fan customer-side.
- IP rating. IP65 minimum for road use; IP67 for auxiliary and off-road applications. Look for the test certificate, not the catalogue claim.
- Honest lumen figures. Ask for the integrating-sphere report rather than a marketing number; a 4,000 lm claim with no report is a complaint waiting to happen.
A note on legality (read before you promise anything)
Retrofit LED bulbs are not approved for road use in every market. In the United States, FMVSS 108 governs headlamps and the NHTSA position on replaceable light sources is restrictive: LED retrofit bulbs are typically sold for off-road, fog-lamp or non-US road use. In Europe, headlamps must hold ECE type approval (R113 for symmetric motorcycle beams, R37 for replaceable filament light sources). In Brazil, the lighting resolution referenced above allows lamp replacement only where the vehicle manufacturer’s literature provides for it, and Inmetro states that LED conversions require DETRAN authorisation and inspection by an accredited body (Inmetro FAQ).
Our LED headlight bulb range is supplied with driver and specification reports so importers can position it correctly — including labelling for off-road and auxiliary applications where local law restricts retrofit road use.
Frequently asked questions
Can I install an H4 LED bulb without removing the headlight assembly?
On most naked and scooter models, yes — the two-piece collar design exists precisely so you can mount the collar through the retaining clip and insert the bulb afterwards. On faired sport bikes you usually need to remove the fairing panel to reach the rear of the housing and refit the dust cover.
Why does my LED headlight flicker at idle?
The most common causes are an unstable charging system at low rpm, a driver that cuts out below a voltage threshold, and error-detection circuits that pulse the lamp to test it. A load resistor or CANbus-ready driver solves the majority of cases.
Do LED bulbs need a relay?
If the original bulb drew 35–55W and the new LED draws 20–30W, no relay is required for that reason alone. Add one if you run auxiliary lights on the same circuit, or if the switchgear is showing heat damage.
Is a fan-cooled LED better than a heat-sink LED?
A fan moves more heat in the same length, which keeps output stable on long night rides; a solid aluminium heat sink has no moving part and no noise. For sealed housings with little airflow, take the heat sink and check the clearance first.
Does an H4 LED fit an H4 halogen housing?
Physically, yes — the base and the retainer are the same. Optically, the result depends on the bulb: a bulb that mimics the halogen filament position (1:1 design) with chips at 3 and 9 o’clock produces a usable cut-off, while an oversized or badly oriented bulb scatters light. That is why specification and QC matter more than wattage claims.
Sourcing H4 LED bulbs and headlight assemblies
MaxorPro manufactures and exports motorcycle LED lighting — H4, HS1 and BA20D bulbs, complete headlight assemblies and auxiliary lights — to distributors across Latin America. Every SKU ships with test reports, IP rating evidence and driver compatibility information, and we produce private-label packaging for importers.
Browse the motorcycle LED lighting catalog or request a quote with the bases and volumes you need.